Configure Frontend
You need to configure your frontend to make this app work. Simply copy the specified codes and paste it to their respective template file accordingly.

To show the warranty information on the product page
AUTO CODE INJECTION
- If you face any problem/error while auto-injecting the code please choose manual option.
MANUAL OPTION
You have to paste the upper code
here
on
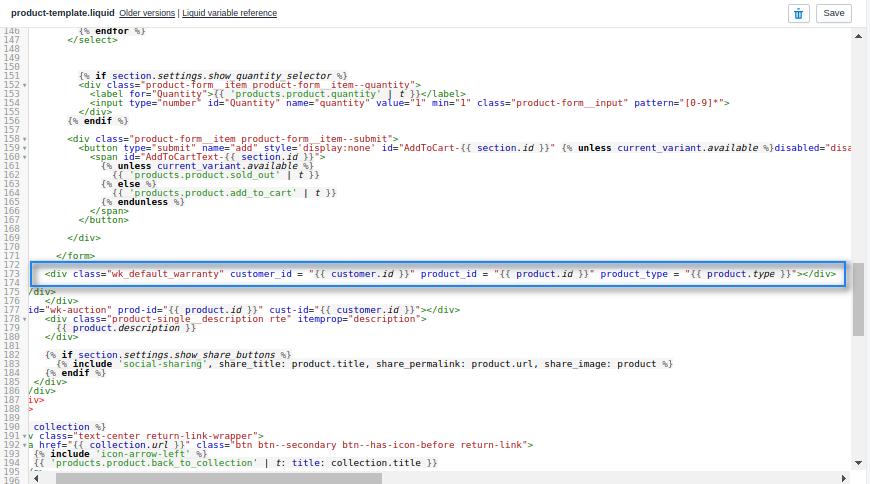
sections/product-template.liquid.
To access the file
click here
<div class="wk_default_warranty" variant_available="{{ product.selected_or_first_available_variant.available }}" variant_id="{{ product.selected_or_first_available_variant.id }}" customer_id = "{{ customer.id }}" product_id="{{ product.id }}" product_type = "{{ product.type }}"></div>
If you are using Online store 2.0 (Example- Dawn), you need to follow the steps to add the codes.
You have to paste the upper code here on sections/main-product.liquid. To access the file click here<div class="wk_default_warranty" variant_available="{{ product.selected_or_first_available_variant.available }}" variant_id="{{ product.selected_or_first_available_variant.id }}" customer_id = "{{ customer.id }}" product_id="{{ product.id }}" product_type = "{{ product.type }}"></div>
To show View Warranty button on customer account page
AUTO CODE INJECTION
- If you face any problem/error while auto-injecting the code please choose manual option.
MANUAL OPTION
You have to paste the upper code
here
on
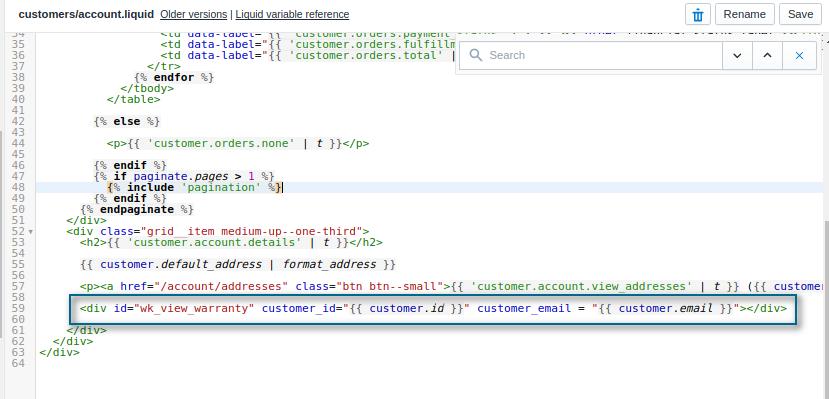
templates/customers/account.liquid. To access the file
click here
<div id = "wk_view_warranty" customer_id="{{ customer.id }}" customer_email = "{{ customer.email }}"></div>
To show Previous order warranty button on customer order page
AUTO CODE INJECTION
- If you face any problem/error while auto-injecting the code please choose manual option.
MANUAL OPTION
You have to paste the upper code
here
on
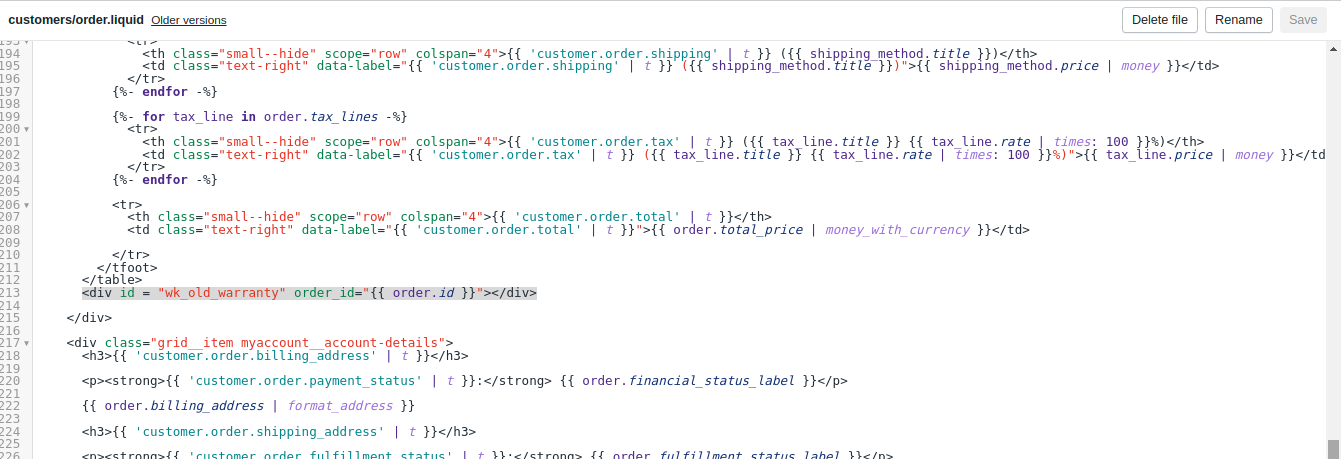
templates/customers/order.liquid. To access the file
click here
<div id = "wk_old_warranty" order_id="{{ order.id }}"></div>
You have to paste the upper code
here
on
templates/customers/order.liquid. To access the file
click here
<div id="main_popup_div"></div>
Account
Order #1355
Placed on
Billing Address
Payment Status: Paid
Test Webkul
Shipping Address
Fulfillment Status: Unfulfilled
Important Note :
For managing extended warranty feature we are creating a product named "Warranty Product", please do not delete that product.